Refrigerant leaks put your health and equipment at risk, so you can expect leak detection, safe recovery, and repairs; just adding freon isn’t a fix, while professional repair restores efficiency and prevents system damage.
Key Takeaways:
- Qualified HVAC technicians locate and repair leaks (using dye, electronic detectors, or pressure tests), replace or repair faulty components, evacuate and vacuum the system, then recharge to manufacturer specifications.
- Adding refrigerant without fixing leaks masks the problem, raises operating costs, reduces efficiency, and risks compressor damage and repeat service visits.
- Regulations and refrigerant type affect cost and compliance: R-22 is phased out and expensive, certified techs must handle refrigerant, and documented repairs may be required for warranties or code compliance.
Why 'Topping Off' Refrigerant Is a Temporary Band-Aid
Topping off refrigerant only masks leaks; you may get temporary cooling, but you leave the leak to widen and increase system stress, causing repeat failures and higher costs.
The Environmental and Legal Impacts of Leaks
Laws protect the atmosphere; if you allow leaks to continue, you risk hefty fines and contribute to greenhouse gas emissions that harm your community.
How Low Refrigerant Levels Damage the Compressor
Low refrigerant forces you to run the compressor harder, causing oil starvation and overheating that can lead to motor burnout.
Your compressor will suffer when refrigerant is low: reduced charge means refrigerant can’t carry heat properly, so you get higher discharge temperatures, poor oil return and eventual loss of lubrication. Repeated stress raises amperage and wears bearings and seals, often forcing an expensive replacement rather than a simple fix.
Common Signs of a Refrigerant Leak in Your AC System
Signs you notice include weak airflow, uneven cooling, rising energy bills, or high indoor humidity; persistent hissing or ice on lines often means a leak. See a homeowner report at XK 8 Air Conditioning-No cold Air.
Reduced Cooling Efficiency and High Indoor Humidity
You may feel warmer rooms, longer run cycles, and elevated humidity; those signs point to lost refrigerant, reduced system capacity, higher bills, and accelerated wear on components.
Audible Hissing Noises and Ice Buildup on Coils
Listen for steady hissing near the indoor unit or service ports; ice forming on evaporator coils or refrigerant lines signals low pressure from leaks and needs professional diagnosis.
Ice on coils develops when pressure drops and temperatures fall; shut the system off to prevent compressor damage, avoid adding refrigerant yourself, and call an EPA-certified technician who will locate the leak, repair or replace parts, evacuate and vacuum the system, then recharge to the proper charge and retest for safety.
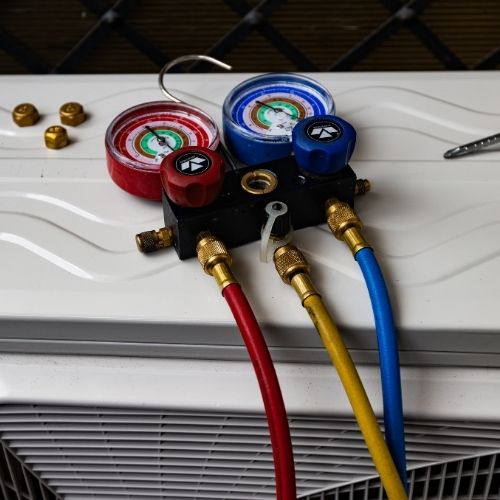
Professional Leak Detection Methods Used by Experts
Experts use a mix of tools to pinpoint leaks quickly, combining electronic sniffers, UV dye, and pressure checks so you get a permanent repair rather than a temporary recharge.
Electronic Leak Detectors and UV Dye Testing
You will often see technicians use electronic leak detectors for fast pinpointing and UV dye to visually confirm small leaks inside coils or fittings.
Nitrogen Isolation and Pressure Testing Procedures
When you isolate system sections and pressurize with dry nitrogen, you reveal hidden leaks without introducing flammable gases.
Pressure testing gives you a controlled way to verify repairs: the crew isolates the circuit, connects gauges and a regulated nitrogen source, then raises pressure to manufacturer-recommended levels (commonly 100-150 psig) and watches the gauge. If you see a drop, the tech sectionalizes the line and uses soapy solution or sniffers to locate the exact leak location before repair. You should insist on dry nitrogen, pressure-rated tools, and safe depressurization-after repair, you’ll expect no pressure drop during the hold test, which proves a permanent fix rather than another temporary refill.
The Step-by-Step Refrigerant Repair Process
| The Step-by-Step Refrigerant Repair Process | |
|---|---|
| Evacuating the System and Sealing the Breach Your system is evacuated to remove remaining refrigerant and moisture, then the leak is located and sealed; do not add refrigerant before repair. | Vacuum Testing and Recharging to Manufacturer Specs Before recharging, a vacuum-hold confirms leak-free lines and you refill to the manufacturer-specified weight using scales and verified pressures. |
Evacuating the System and Sealing the Breach
You or your technician recover refrigerant, pull a deep vacuum to remove moisture, then repair or replace the failed component and seal the breach; never top off.
Vacuum Testing and Recharging to Manufacturer Specs
Then you perform a vacuum-hold test to ensure the system maintains low pressure with no rise before proceeding to recharge.
During vacuum testing you or your technician pull a deep vacuum (often to 500 microns or lower) and monitor for pressure rise-any rise suggests a leak or trapped moisture. After a successful hold, you recharge by weight with certified scales to the manufacturer’s specified refrigerant mass, verify operating pressures and superheat/subcooling, and complete a post-charge leak check and performance test to confirm safe, efficient operation.
Understanding the Costs: Repair vs. Full Component Replacement
Repair costs vary by leak location, parts, and refrigerant; you may pay less upfront, but repeated fixes add up. A full component replacement stops recurring leaks and can prevent higher long-term expenses.
Analyzing the Age of the Unit and Refrigerant Type
Age and refrigerant type determine options: older systems with obsolete refrigerants often require costly retrofits or replacement, while newer units using current refrigerants may be repairable; you should factor certification and long-term availability into your choice.
Long-Term Savings of a Permanent Fix Over Periodic Refills
Choosing a permanent repair eliminates ongoing refrigerant purchases and service calls; you’ll save over time and reduce the risk of unplanned breakdowns and environmental harm from leaks.
Calculating long-term savings means comparing annual costs of periodic refrigerant recharges, technician visits, and reduced efficiency against the one-time expense of replacing the failed component. You should expect a higher initial outlay for replacement, but permanent fixes typically restore full efficiency, cut energy bills, and eliminate repeated exposure to leaks-translating to substantial savings and lower safety and environmental risk over 3-5 years.
Final Words
If your AC is low on refrigerant in Grand Prairie, it’s almost always a sign of a leak—and “just adding Freon” only buys short-term relief while the real problem gets worse. A proper leak repair should include professional detection, safe refrigerant recovery, the right component repair or replacement, a deep vacuum and hold test, and a recharge to manufacturer specifications. Done correctly, that’s what restores efficiency, protects your compressor, and prevents repeat service calls.
When you want a permanent fix—not a temporary top-off—Boost Air Heating and Cooling is here to help. Our hvac contractor team provides leak detection you can trust, EPA-certified refrigerant handling, and clear recommendations so you understand your options before any work begins. If your system is struggling to cool, icing up, or running nonstop, schedule a Grand Prairie AC repair visit with Boost Air Heating and Cooling and we’ll help you get reliable, efficient cooling back—safely and the right way.